Sunday, July 22, 2018

Sensory Sunday - Snacking


Hey, it’s Sensory Sunday again and today we will be doing some sorting with snacks! Our kiddie plates are perfect for this easy project. This activity is good for developing a child’s sorting and patterning skills. 

What you will need:
πŸͺ 1 - 2 Kiddie Bites plates. You can find these plates on Amazon and use code KIDDIE10 for 10% off your plate set.
πŸͺ 2 - 4 small snacks. For this, I used Kashi wheat squares, popcorn, chocolate chips, cheerios

There are 3 ways I found to set up the snacks to help your LO sort them. The first way was to place a few pieces of each snack in the smaller sections of your Kiddie Bites plates. Then in the larger section mix the 4 snacks together. Then explain to your little one what to do. Demonstrating how to sort is also a great way to explain. If you are demonstrating what to do say hooray and clap when you place the snack in the correct section. This way your LO knows they did it correctly. This can also be a fun game. Especially when your LO sneaks a few or all the snacks. 

The second way you can set this activity up is by placing all the snacks in the large container and let your LO decide where they go. This will also help to develop their independence.

The last way worked best for Sephira because she was way more interested in eating her snacks. So I took the mini wheat which was her least favorite and I buried her favorite snacks underneath. This is a similar concept to hiding toys under a blanket.

Hope you enjoyed this edition of Sensory Sunday!

Don't forget to follow my blog by clicking the Follow button at the bottom. Also, you can follow me on Facebook @Veggiemomster and on Instagram @SepiraLee_BrandRep.


Sunday, July 15, 2018

Sensory Sunday - Slime DIY


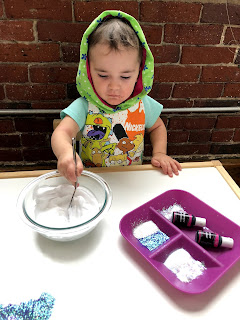
It’s been a long time since doing a Sensory Sunday. But we’re back and we are going to make some slime? I really like this sensory project because it’s super easy and fun for all ages. I'm going toshow you two fun ways to make your slime.


Here is what you are going to need for your Galaxy Slime;
πŸ’š4oz or 1/2 cup of white glue
πŸ’š1/2 cup of shaving cream
πŸ’š Fine holoraphic glitter
πŸ’šChunky holographic glitter
πŸ’šBlack and teal food coloring
πŸ’š1 tsp of borax
πŸ’š1 cup of water
πŸ’šSmall Jar to store your slime

First, in a small bowl combine the water and borax, then set aside. You can microwave for 30 second to help combine the borax/water mixture faster. Then, in a medium size bowl add your glue. Try and get all the glue out into the bowl by squeezing and flentening the bottle. You can now add your shaving creame, and glitter, then stir until all combined.  At this point you can add whatever fun items to make your slime unique (combuches, different size beads, buttons, charms, etc.). Now you’re ready to add your water borax mixture. This mixture is what turns your glue into slime. Start with 1 tbsp at a time and you can continue to add while you nead your slime. Once your slime is no longer sticky separate it into 3 piles. Add a few drops of your black foodcoloring to one pile and a few trops of your teal to the other. nead the slime until the coloring has been combined. This can get messy so you can use gloves to keep your hands clean. Now that everything is colored it's read to play with. **Remenber never leave your little one alone with the slime or the ingrediants.**


Here is what you are going to need for your green Nickelodeon Slime;
πŸ’š4oz or 1/2 cup of clear glue
πŸ’š Neon Green Glitter
πŸ’šRainbow Beads
πŸ’š1 tsp of borax
πŸ’š1 cup of water
πŸ’šSmall Jar to store your slime

First, in a small bowl combine the water and borax, then set aside. You can microwave for 30 second to help combine the borax/water mixture faster. Then, in a medium size bowl add your glue. Try and get all the glue out into the bowl by squeezing and flentening the bottle. You can now add your glitter and beads, then stir until all combined.  At this point you can add whatever fun items to make your slime unique (combuches, different size beads, buttons, charms, etc.). Now you’re ready to add your water borax mixture. This mixture is what turns your glue into slime. Start with 1 tbsp at a time and you can continue to add while you nead your slime. Once your slime is no longer sticky it's read to play with. **Remenber never leave your little one alone with the slime or the ingrediants.**


Hope you enjoyed this edition of Sensory Sunday!

Don't forget to follow my blog by clicking the Follow button at the bottom. Also, you can follow me on Facebook @Veggiemomster and on Instagram @Theveggiemomster.