Showing posts with label Sensory. Show all posts

Sunday, July 22, 2018

Sensory Sunday - Snacking


Hey, it’s Sensory Sunday again and today we will be doing some sorting with snacks! Our kiddie plates are perfect for this easy project. This activity is good for developing a child’s sorting and patterning skills. 

What you will need:
๐Ÿช 1 - 2 Kiddie Bites plates. You can find these plates on Amazon and use code KIDDIE10 for 10% off your plate set.
๐Ÿช 2 - 4 small snacks. For this, I used Kashi wheat squares, popcorn, chocolate chips, cheerios

There are 3 ways I found to set up the snacks to help your LO sort them. The first way was to place a few pieces of each snack in the smaller sections of your Kiddie Bites plates. Then in the larger section mix the 4 snacks together. Then explain to your little one what to do. Demonstrating how to sort is also a great way to explain. If you are demonstrating what to do say hooray and clap when you place the snack in the correct section. This way your LO knows they did it correctly. This can also be a fun game. Especially when your LO sneaks a few or all the snacks. 

The second way you can set this activity up is by placing all the snacks in the large container and let your LO decide where they go. This will also help to develop their independence.

The last way worked best for Sephira because she was way more interested in eating her snacks. So I took the mini wheat which was her least favorite and I buried her favorite snacks underneath. This is a similar concept to hiding toys under a blanket.

Hope you enjoyed this edition of Sensory Sunday!

Don't forget to follow my blog by clicking the Follow button at the bottom. Also, you can follow me on Facebook @Veggiemomster and on Instagram @SepiraLee_BrandRep.


Sunday, July 15, 2018

Sensory Sunday - Slime DIY


It’s been a long time since doing a Sensory Sunday. But we’re back and we are going to make some slime? I really like this sensory project because it’s super easy and fun for all ages. I'm going toshow you two fun ways to make your slime.


Here is what you are going to need for your Galaxy Slime;
๐Ÿ’š4oz or 1/2 cup of white glue
๐Ÿ’š1/2 cup of shaving cream
๐Ÿ’š Fine holoraphic glitter
๐Ÿ’šChunky holographic glitter
๐Ÿ’šBlack and teal food coloring
๐Ÿ’š1 tsp of borax
๐Ÿ’š1 cup of water
๐Ÿ’šSmall Jar to store your slime

First, in a small bowl combine the water and borax, then set aside. You can microwave for 30 second to help combine the borax/water mixture faster. Then, in a medium size bowl add your glue. Try and get all the glue out into the bowl by squeezing and flentening the bottle. You can now add your shaving creame, and glitter, then stir until all combined.  At this point you can add whatever fun items to make your slime unique (combuches, different size beads, buttons, charms, etc.). Now you’re ready to add your water borax mixture. This mixture is what turns your glue into slime. Start with 1 tbsp at a time and you can continue to add while you nead your slime. Once your slime is no longer sticky separate it into 3 piles. Add a few drops of your black foodcoloring to one pile and a few trops of your teal to the other. nead the slime until the coloring has been combined. This can get messy so you can use gloves to keep your hands clean. Now that everything is colored it's read to play with. **Remenber never leave your little one alone with the slime or the ingrediants.**


Here is what you are going to need for your green Nickelodeon Slime;
๐Ÿ’š4oz or 1/2 cup of clear glue
๐Ÿ’š Neon Green Glitter
๐Ÿ’šRainbow Beads
๐Ÿ’š1 tsp of borax
๐Ÿ’š1 cup of water
๐Ÿ’šSmall Jar to store your slime

First, in a small bowl combine the water and borax, then set aside. You can microwave for 30 second to help combine the borax/water mixture faster. Then, in a medium size bowl add your glue. Try and get all the glue out into the bowl by squeezing and flentening the bottle. You can now add your glitter and beads, then stir until all combined.  At this point you can add whatever fun items to make your slime unique (combuches, different size beads, buttons, charms, etc.). Now you’re ready to add your water borax mixture. This mixture is what turns your glue into slime. Start with 1 tbsp at a time and you can continue to add while you nead your slime. Once your slime is no longer sticky it's read to play with. **Remenber never leave your little one alone with the slime or the ingrediants.**


Hope you enjoyed this edition of Sensory Sunday!

Don't forget to follow my blog by clicking the Follow button at the bottom. Also, you can follow me on Facebook @Veggiemomster and on Instagram @Theveggiemomster.

Friday, March 31, 2017

Fast Fun Friday - Ribbons


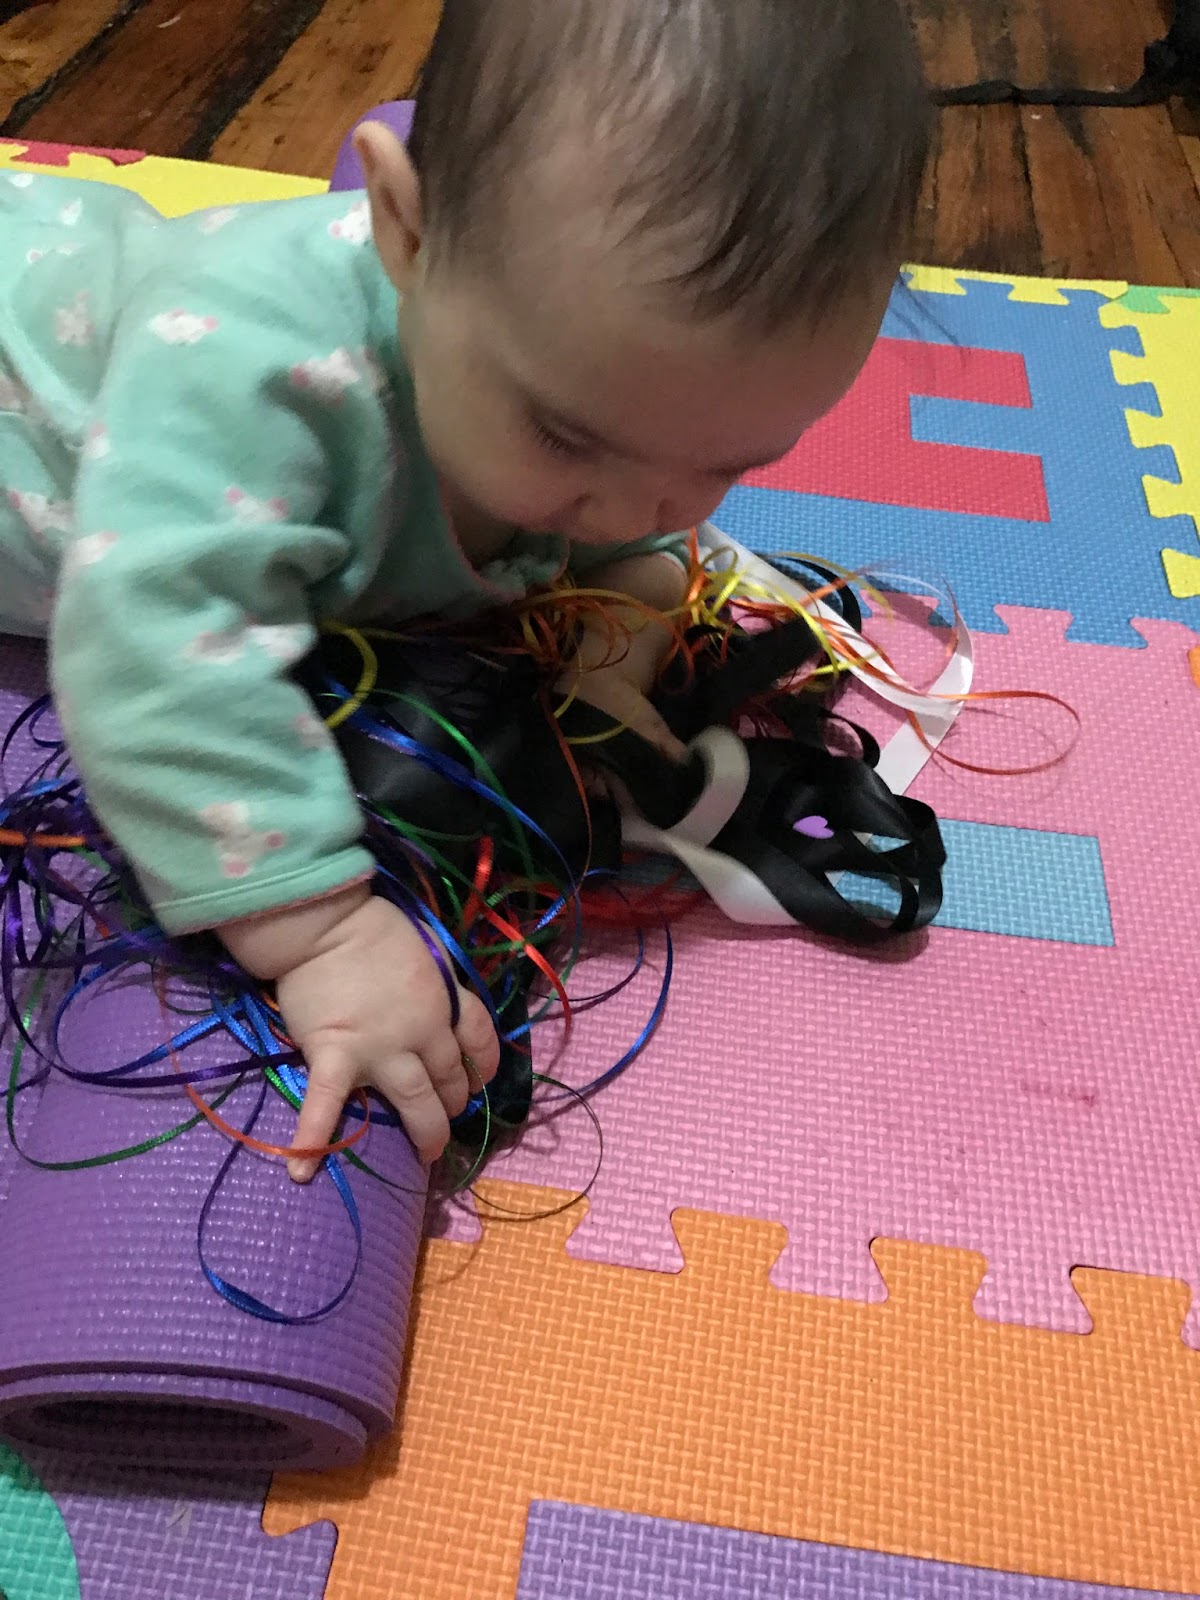
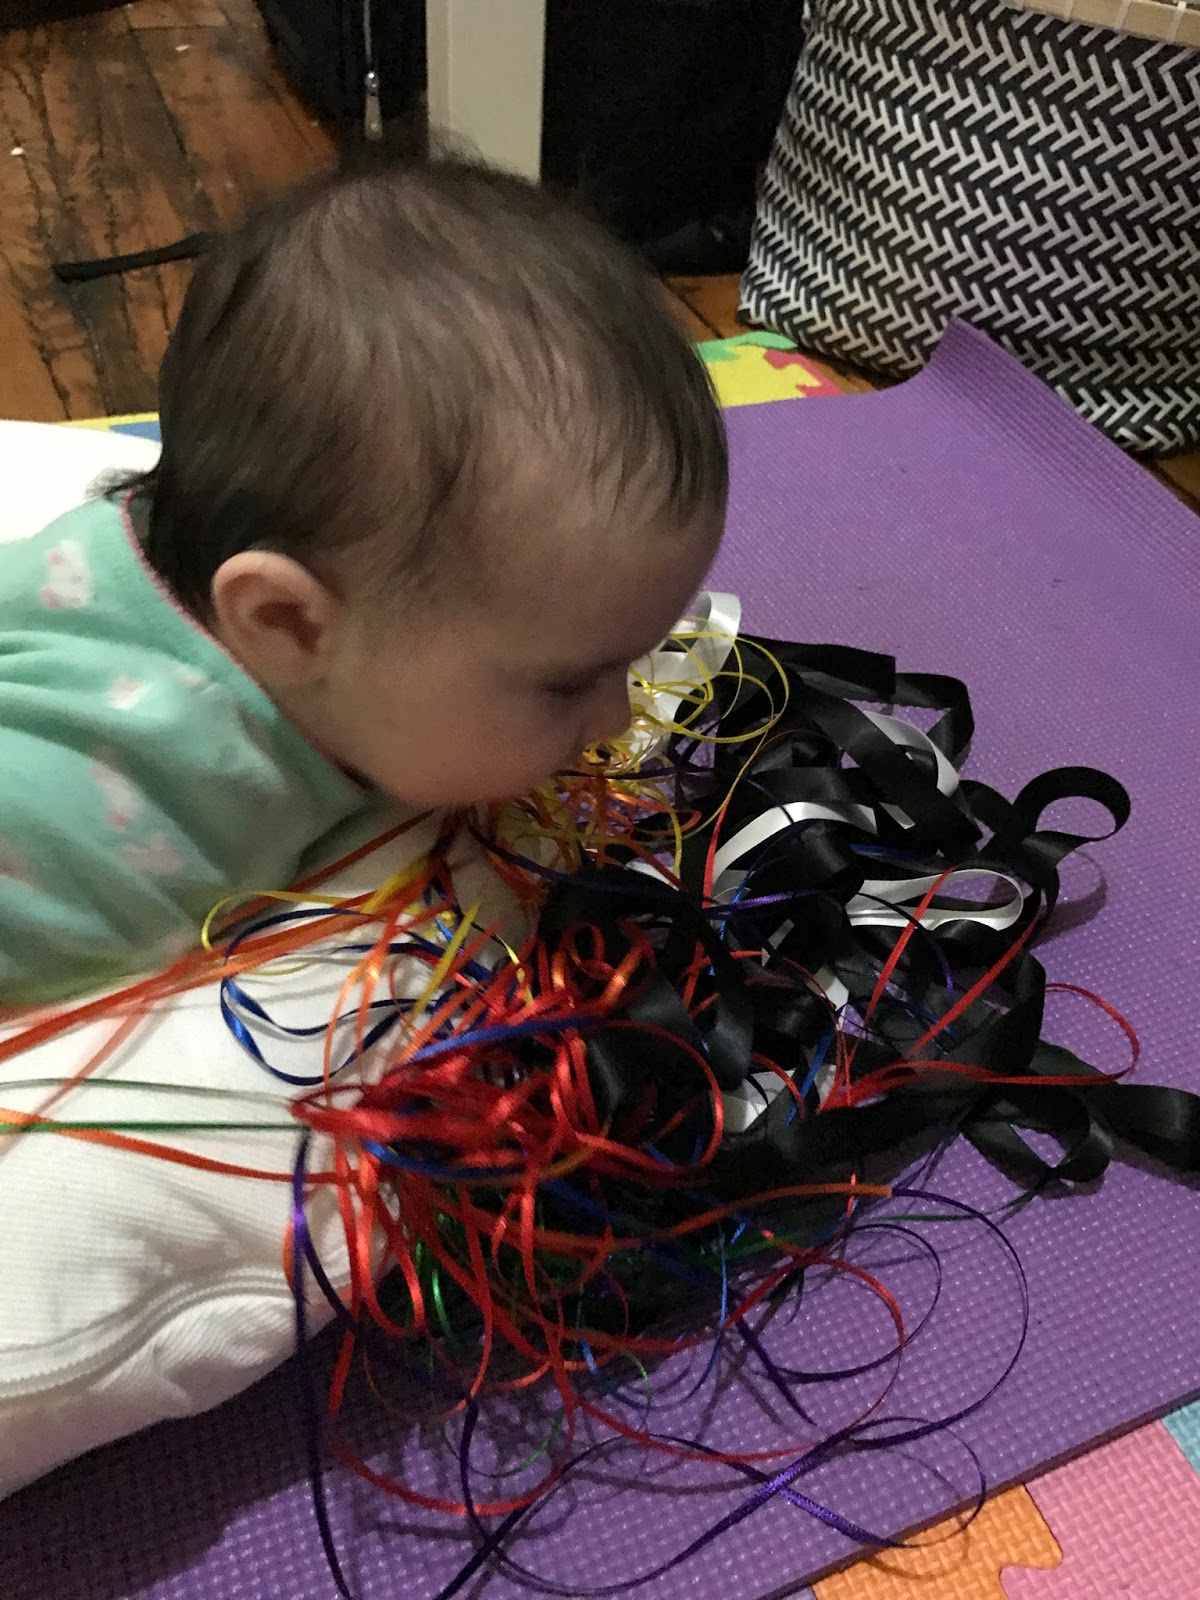
A great sensory play time is using different types of ribbon. There are so many types of colors, texture, and sizes. Because the ribbon is thin they will be great for baby's fine motor skills. I came up with this idea after my LO's 6-month photo. She was so interested in playing with the ribbon I used for the rainbow.  I alway try to have something that is a part of my LO's photos that will keep her attention and keep her happy. I also like this project because you can keep the ribbon in a plastic bag and use it again. Also, you can add more ribbon as time goes on. This will keep it interesting for your LO. You can add scraps of ribbon you may have from different projects, so they do not go to waste.

What you will need;
๐Ÿ’œ Different color, texture and size ribbon
I'm using some thin red, orange, yellow, green, blue and purple ribbon. Then some thinker black and white ribbon.


For this project, I just propped my LO with a rolled up yoga mat and DockATot and placed the entangled ribbon.

Do not leave your LO alone with the ribbon because this could be extremely dangerous if they get too tangled.

Don't forget to follow my blog by clicking the Follow button at the bottom. Also, you can follow me on Facebook @Veggiemomster and on Instagram @Theveggiemomster.

Friday, March 24, 2017

Fast Fun Friday - Rice Play


This week for Fast Fun Friday, we are going to be playing with rice. I like using uncooked rice for playing because your baby will be able to manipulate it easier. You can write numbers and letters using your babies fingers or your own. Also, rice is one of the best things for fine motor skills.

Thing you will need;
๐Ÿ’™ Rice
๐Ÿ’™ Pan or Tupperware
๐Ÿ’™ Food Coloring (Optional)
๐Ÿ’™ Small Baby Toys (Optional)

If you have food coloring you can also add color to your rice. If you decide to do this I would suggest making 2 to 4 separate bowls of rice and coloring them each a different color. Then on your pan, you can add each color of rice to the separate corners. Your little one will have fun as they mix the colors together. If you don't have any food coloring you can use different types of rice for you LO to mix together. Some good options to mix would be White, Brown, Chinese Black Rice, Wild Rice, etc.
Also, like more of my Fast Fun Friday project you can add small toys to the rice. Feel free to add more rice to hide your LO's toys so they can use their hands to dig for them. Rice will get everywhere so make sure your playing surface is easy to clean.


*Never leave your baby alone unsupervised while playing with the rice. 

Hope you had fun with this quick and easy sensory play. Tomorrow we will be doing an Easter outfit sewing project, so stay tuned.

Don't forget to follow my blog by clicking the Follow button at the bottom. Also, you can follow me on Facebook @Veggiemomster and on Instagram @Theveggiemomster.

Friday, March 17, 2017

Fast Fun Friday - Water Play

This will be the easiest edition of Fast Fun Friday ever! All you need for this is you baby, water, and a pan. This is a similar concept as giving your baby food to play with. It does give the added splash of the water and sound it makes when they splash.

What you will need for this project
๐Ÿ’งWater
๐Ÿ’งPan
๐Ÿ’งTowel
๐Ÿ’งBolster or rolled up yoga mat
๐Ÿ’งToys (Optional)
๐Ÿ’งNontoxic Baby Soap (Optional)
๐Ÿ’ง Food Color (Optional)

First lay a towel down on your baby's play surface. Put your pan on top of the towel. Then take your pitcher of water and fill the pan half way. You can start playing or add some soap or toys. If you add soap just swish the water around to make the bubbles.  If you are using food coloring you may want to use a clear Tupperware so you will be able to see the color. Once you get all set up, you can start to play with your little ones.


Hope you had fun with this quick and easy sensory play. Stay tuned tonight for a St Patrick's day ๐Ÿ€ milk bath tutorial.

Don't forget to follow my blog by clicking the Follow button at the bottom. Also, you can follow me on Facebook @Veggiemomster and on Instagram @Theveggiemomster.

Sunday, March 12, 2017

Painting Sensory Play. . . with Clothes!


On Pinterest I have seen a bunch of sensory paint projects, that I have done with my little one. They are all very fun and they give you a nice keepsake. I will definitely be posting directions on how to put these together in the future. This post will be taking sensory painting to the next level with fabric paint. I came up with the idea since this would give you a keepsake your little one could use after the project.

You can make this as simple or as complicated as you want. I did mine in a few steps, but feel free to stop after the first.

Things you will need
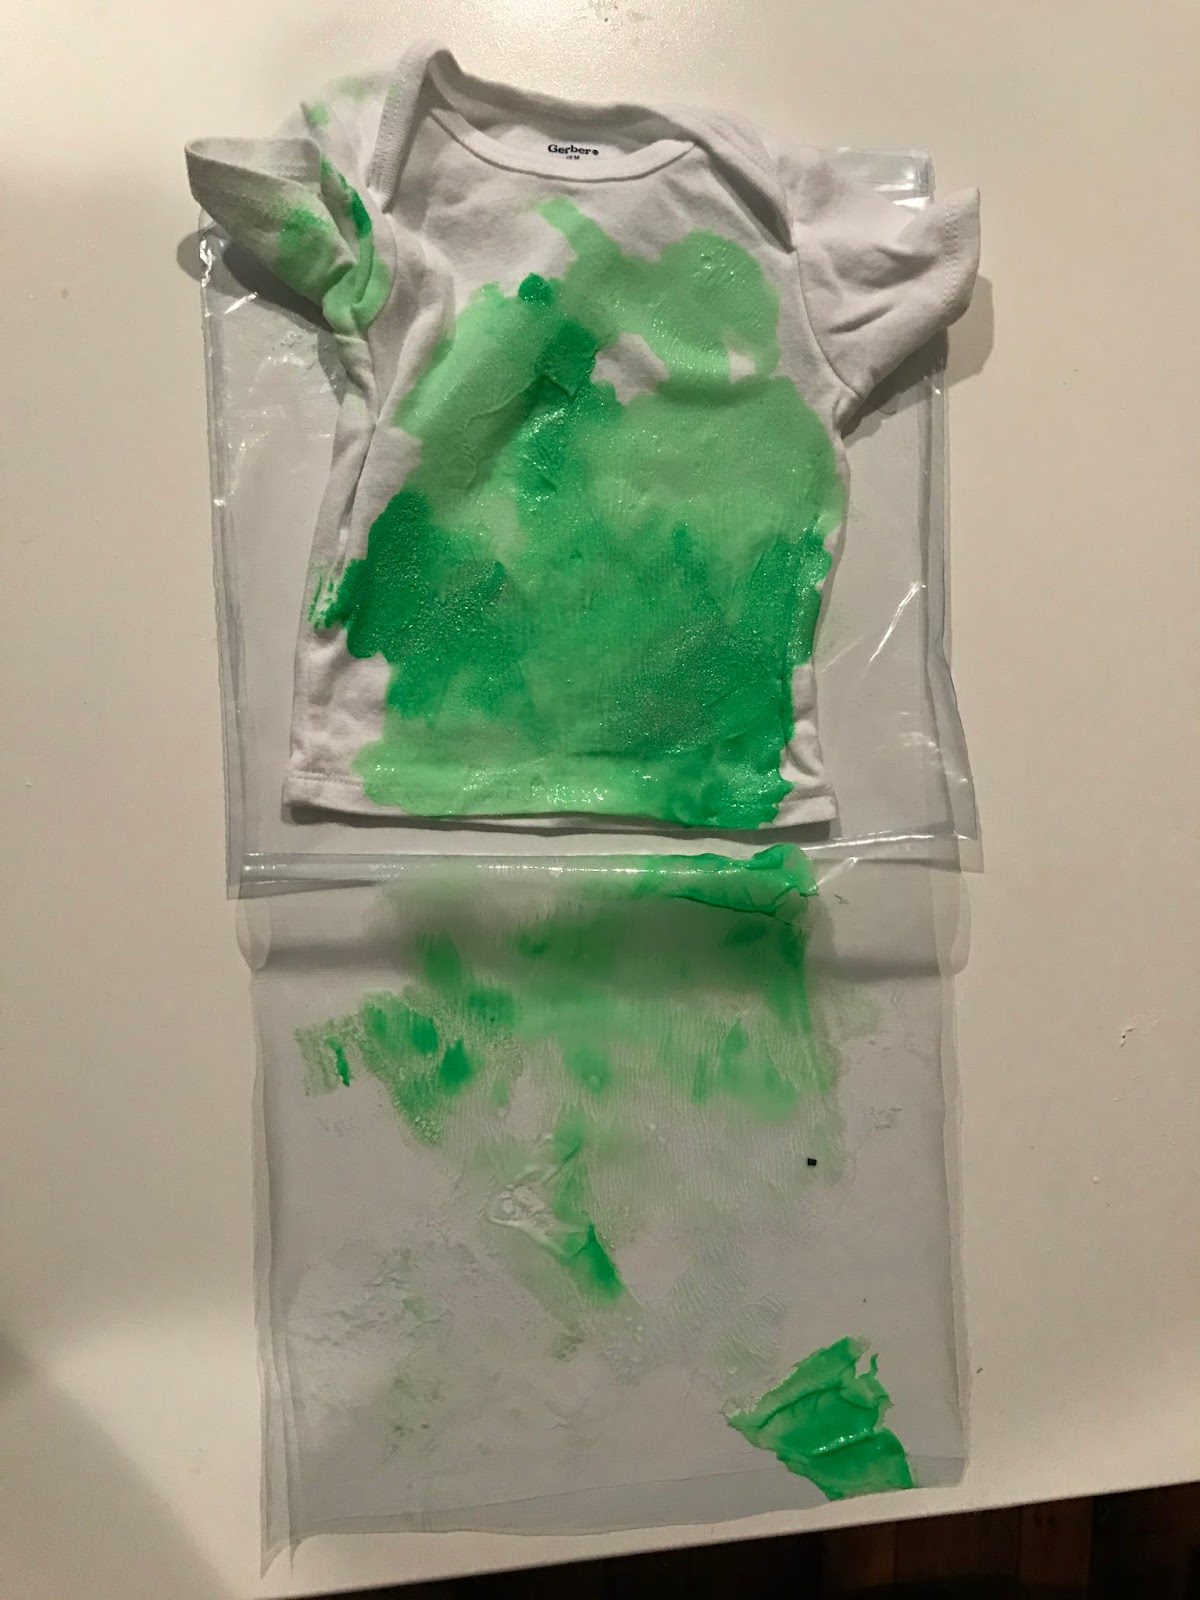
An article of clothing that has been washed (I picked a white Gerber tee shirt)
Fabric paint you can pick up from most craft stores (I'm using neon sparkle green, glow in the dark green, sparkle pink and purple)
Puff fabric paint (I'm using green and purple)
3 Ziploc freezer bags (you will only need 2 if you are just doing the first step)
Duck tape
Scissors
Bolster or yoga mat


The first thing you will want to do is get your Ziploc bag ready. Because we are using clothing, you will need to add something in between the fabric. This way, the fabric won't stick together when the paint dries. I ended up using a cut up Ziploc bag for this, inside the shirt. My dimensions were 9x6 inches.

After cutting your bag, you will get 2 pieces. Insert one into the shirt (see image 1). Then place the shirt into your Ziploc bag. Go to the area you plan on setting up the project and bring all your supplies including your baby.
Image 1


I first taped down one side of the shirt (not the part with the opening because that's where we are going to add the paint.) make sure your article of clothing is flat, then add the paint carefully. I started with the neon green and glow in the dark green. Carefully push as much air out without smudging the paint too much. Close the bag up and tape it down to their playing surface.

My little one can't sit up yet, so I use a rolled up yoga mat to prop her up. You can also use a bolster, or tape it to their chair's tray. They watch them play. Don't leave the baby alone to play in case the bag gets punctured.

When they are done having fun, move your baby to a safe place like their crib or chair. Then take the bag to a safe place to dry. You first want to cut the bag off and slowly peel off the flap so you don't ruin their masterpiece. At this point, you can let it dry overnight and you're done. I did want to take it a few steps further with adding more color during another play session. This way I get more play out of one project.


Once the shirt was dry from the first session. I took the shirt and put it in a new plastic Ziploc bag. I repeated the process with pink and purple fabric paint. After she was done playing I cut open the bag and let the paint dry.


Again you could stop at this point you can stop and enjoy your baby's masterpiece. But I wanted to take it one step further. This part is more for the parents to enjoy doing. The paint said to let it dry for 72 hours before washing. So, I let the paint dry for 3 days the washed it. I then let it air dry. Using the puff paint I added some characters from my favorite 90s cartoons. This added some super cute detail to the shirt. Also, make sure you keep the plastic from the beginning of the project so you can slip it in between the shirt.

The puff paint that I used also takes 72 hours to dry before washing. But once you're done you have a super cute shirt that you and your baby made together.

Hope you enjoyed this edition of Sensory Sunday. Make sure you come back on Monday to see what our watch our outfit is for Matching Outfits Monday!

Don't forget to follow my blog by clicking the Follow button at the bottom. Also, you can follow me on Facebook @Veggiemomster and on Instagram @Theveggiemomster.

Friday, March 10, 2017

Fast Fun Friday - With Spaghetti


This Week's post for Fast Fun Friday will be, playing with spaghetti. This is a fun, cheap, and easy way to introduce sensory play. Playing with spaghetti will contribute to developing your baby's fine motor skills. By adding toys to the spaghetti you can contribute to hand-eye coordination and contrast. Also, try adding a baby food puree when baby starts to get bored to give the spaghetti a different color and texture. Another benefit to using food for sensory play is it is nontoxic. Although you still never want to leave your little one alone while playing, since the pasta could still be a choking hazard.

For this project you will need the following;
   -Package of the cheapest spaghetti (Feel free to experiment with different types, for example, fettuccine, lasagna noodles, or angel hair)
   -Pot and Water for cooking the pasta
   -Large tupperware or saran wrap and duck tape
   -Rolled up yoga mat, bolster or baby chair with tray
Optional:
    -Small Baby Toys (Teethers or rattles that are easy to clean)
    -Baby Puree

Start by cooking your pasta according to the directions. Once it is cooked strain the pasta and run it under cold water. **You want to make sure the pasta is not hot when your baby is playing because this could burn them. 

I first started by just allowing my little one to play in the spaghetti as it was.


Then as I noticed her getting bored I tangled some toys into the spaghetti. **You can tell your LO is bored when they start looking around and are no longer interested in what is in front of them.


After that, I took away the toys and added some baby puree. I selected green and purple baby food to give the pasta a better contrast.


For clean up, you can cover the spaghetti and store it in the fridge to play with again the next day. Make sure you don't let baby play with old moldy pasta. I would say rule of thumb, would be after 2 days in the fridge or after the second play time throw it away.

If you didn't add any baby food just wipe off your baby's hands with a wipe and you're ready for your next activity.

Hope you enjoyed this edition of Fast Fun Friday. Make sure you come back on Sunday to see what our next project is for Sensory Sunday!

Don't forget to follow my blog by clicking the Follow button at the bottom. Also, you can follow me on Facebook @Veggiemomster and on Instagram @Theveggiemomster.