Showing posts with label Mom Blogger. Show all posts

Sunday, July 22, 2018

Sensory Sunday - Snacking


Hey, it’s Sensory Sunday again and today we will be doing some sorting with snacks! Our kiddie plates are perfect for this easy project. This activity is good for developing a child’s sorting and patterning skills. 

What you will need:
🍪 1 - 2 Kiddie Bites plates. You can find these plates on Amazon and use code KIDDIE10 for 10% off your plate set.
🍪 2 - 4 small snacks. For this, I used Kashi wheat squares, popcorn, chocolate chips, cheerios

There are 3 ways I found to set up the snacks to help your LO sort them. The first way was to place a few pieces of each snack in the smaller sections of your Kiddie Bites plates. Then in the larger section mix the 4 snacks together. Then explain to your little one what to do. Demonstrating how to sort is also a great way to explain. If you are demonstrating what to do say hooray and clap when you place the snack in the correct section. This way your LO knows they did it correctly. This can also be a fun game. Especially when your LO sneaks a few or all the snacks. 

The second way you can set this activity up is by placing all the snacks in the large container and let your LO decide where they go. This will also help to develop their independence.

The last way worked best for Sephira because she was way more interested in eating her snacks. So I took the mini wheat which was her least favorite and I buried her favorite snacks underneath. This is a similar concept to hiding toys under a blanket.

Hope you enjoyed this edition of Sensory Sunday!

Don't forget to follow my blog by clicking the Follow button at the bottom. Also, you can follow me on Facebook @Veggiemomster and on Instagram @SepiraLee_BrandRep.


Wednesday, June 21, 2017

Taking Photo's of you Little One - Flag Day Contest


Flag Day Photo Contest

So this week Sephira is in a photo contest. So I figured I would do a blog post on how to get an adorable photo of your LO. There are a few things you should always have handy for taking cute photos. Number one is a backdrop. For this, I usually use 1-2 yards faux fur fabric. This is great for laying your little one on. Don't worry about getting outside objects or backgrounds in the photo since they can always be cropped out. For the colors of the fur make sure you have black, white and cream always on had. These colors go with everything and you won't feel like you have to purchase a different color for each shoot. Another item that helps make positioning your little one easier especially for ones who can set up yet is a basket of some kind.  Again have a neutral color and/or print like chevron is great for most of your photo. With the fur, you can just lay it on a couch, bed, pillows, co-sleeper, or floor. You can also place it in the basket with the fur sticking out. Again this helps prop up little ones that can't quite sit up on their own. If you just want to use the basket and no fur you can try a towel, face cloths or cloth diapers to help prop your baby up. 
Use a Chevron basket to prop up your little one.
Something that also makes picture taking fun is props. These could be anything from holiday decorations to baby toys/stuffed animals. One thing to keep in mind with props is if you're not using these props outside of your pictures they can pile up. So using fresh flowers can cut down on the hoarding of props.


Now to my favorite part, dressing your baby. For newborn pictures having some cute bows is always a must. Again always have bows or bow ties in neutral colors black, white and cream. If you know that you are going to be taking lots of pictures red, orange, yellow, green, blue and purple are great to have in hand. When purchasing bows I always try to get head wraps. They can be a bit more pricey but they will grow with your baby. This way you are getting good quality and more pictures out of them. I purchase my head wraps from HelloMissGorgeous on Esty. They are great quality and they ship fast. 
Black Headwrap from HelloMissGorgous
If you're like me and love cute outfits then here are some of my favorite sellers on Esty that sell the sweetest outfits and accessories for photo shoots BBOWSBOUTIQUE, HelloMissGorgous, SofiaandBelle, NordeensBabyCouture, BabySquishyCheeks, BowtifulSoul, CandyFacesShop, and Katescouturedesign. If you are looking for cheaper more generic options then Amazon Prime always has options for not just clothes and accessories, but also baby photo props like faux fur, wrap blankets and cute accessories. Though I get my fur from Distinctivefabric.com. 
Onesie From BabySquishyCheeks and Shorts from CandyFacesShop

Headwrap from HelloMissGorgous

Headwrap from HelloMissGorgous and Fur from Distinctivefabric.com

For editing photo's there are 3 apps that I like to use. PS Express (free), FotoRus (Free with in app purchases) and Union ($1.99). Union has to be my favorite because you can have a photo of your LO and completely remove the background and replace it with whatever you want. PS Express is good for erasing minor blemishes. FotoRus is also good for blemishes and has some other crazy options to add makeup to your face. This is one of those in app purchases though.

If you like this post and I gave you a few ideas for photographing your LO then please share this with other moms. Also Please go to the link and like my Little Girl's photo on the Brady Sullivan Facebook Page so we can win! Thanks so much for reading!

Link to photo: Flag Day Contest

Monday, June 5, 2017

Matching Outfits Monday - Unicorns


Welcome back to Matching Outfits Monday, It's been a few weeks since I've been able to post one of these since my LO has been sick. But she is feeling much better now and we are getting back on track with our posts. So about a week ago we went to a circus camp and I needed some adorable outfits for the weekend. Also side note sometime in the next few weeks, I will post what we packed and how we survived the weekend with a teething 8-month-old with eczema.

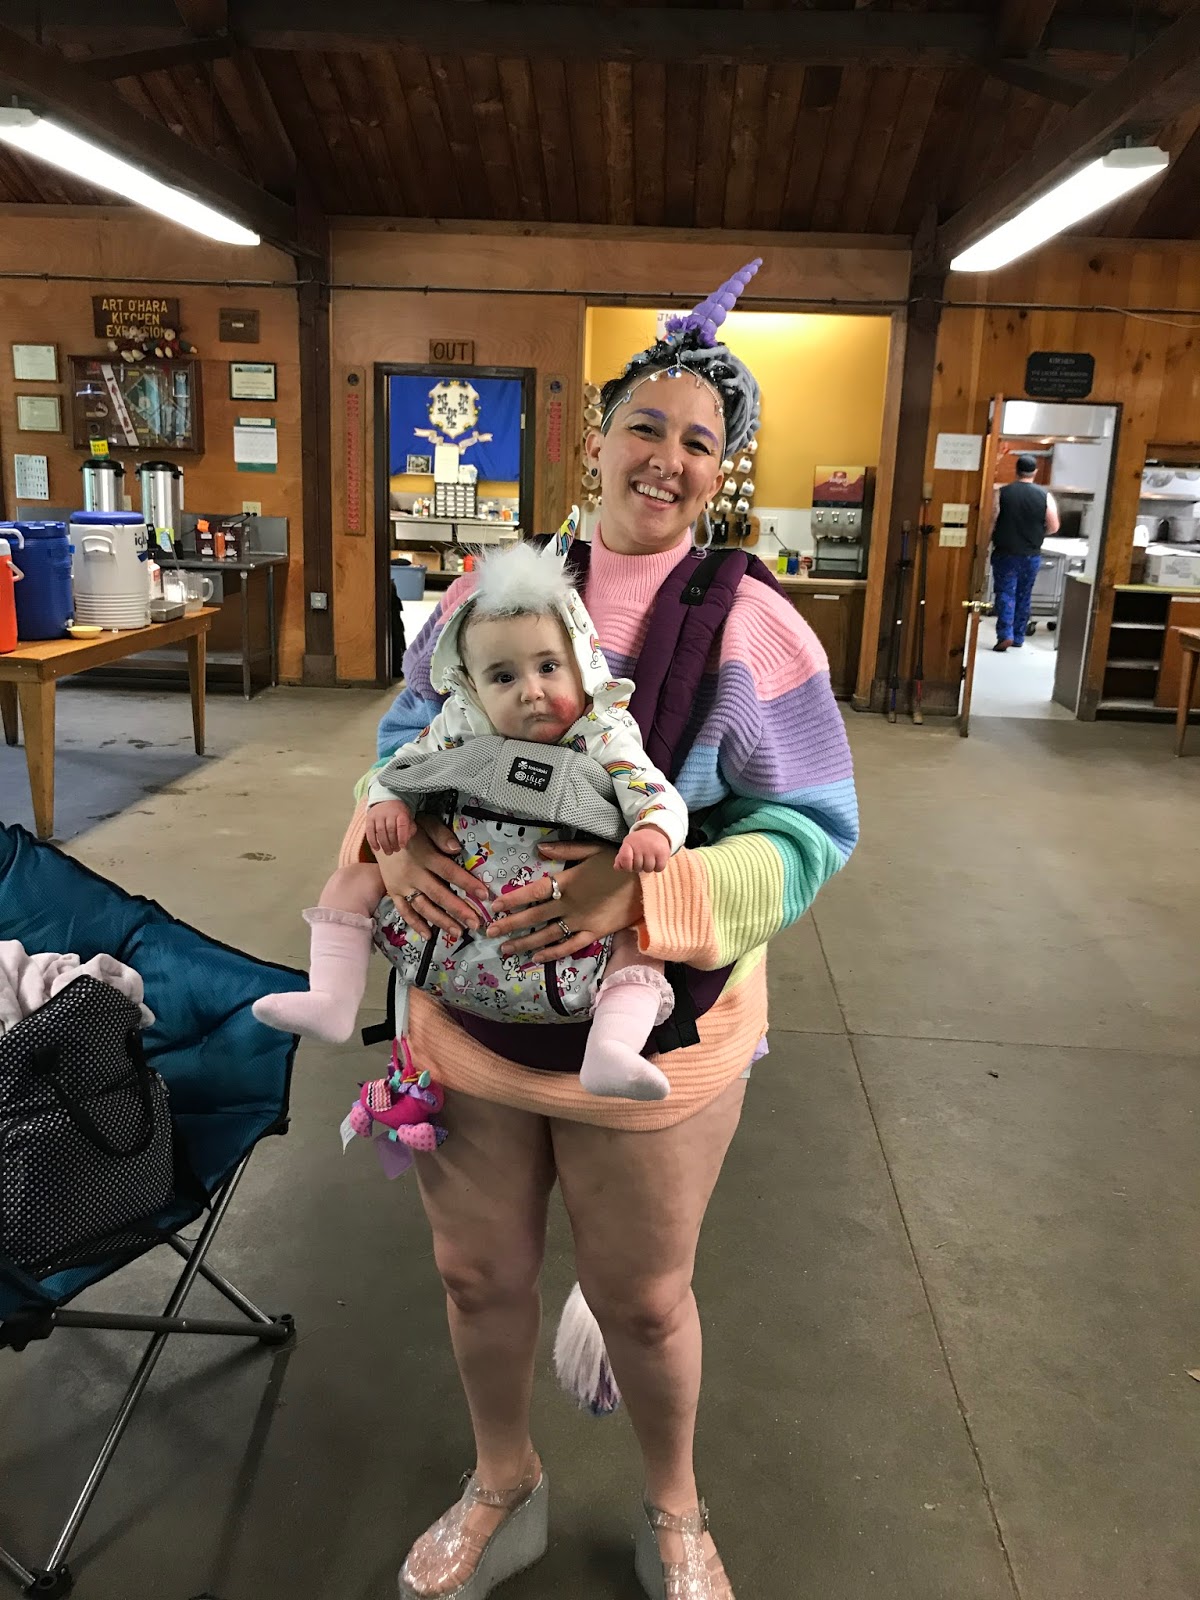
So, back on track, of course, our outfits had to match in some way shape or form so I picked some easy categories and when from there. Our First day we when with Unicorns. You just can't go wrong with unicorns at a circus camp.

For my outfit, I wore a purple unicorn print t-shirt that I modified. I followed this tutorial to cut a v-neck with a collar into the shirt. I then paired it with some simple gray shorts and my platform jellies from UNIF. When it got a bit chilly I wore UNIF's pastel Forst Sweater. For accessories, I got a unicorn horn from Amazon. The headband was very tight so I cut it off and hot glued a hair clip. So nothing was wasted I took the elastic headband I cut off and make a hair elastic. To carry my LO around in I had a Unicorn Toki Doki printed LILLE carrier.


Links to my outfits hear
Shirt - XL
Sweater - XL
Jellies - 9
Carrier
Unicorn Horn - Color violet felt. I got the size medium but you can get it in an adjustable size if you don't want to use a clip.

More Importantly, my LO wore a  ruffle leotard from Baby Squishy Cheeks on Etsy. I was really excited to finds this seller because every time I found this style of leotard they didn't come with snaps for easy diaper changes. But these ones do and they come in 4 colors light pink, light purple, black and white. For this outfit, I purchased the light pink. Do be careful when washing, make sure they are will like colors and wash in a lingerie bag if you have one. 

I paired her leotard with the most perfect high waisted unicorn shorts from Candy Faces Shop on Esty. I loved the high waist on these shorts they just made the outfit. The high waist gives a cute ruffle top. They fit perfectly, I gave the owner Covantry my LO's measurements and asked her to make them a little larger. They fit perfect with room to grow without looking too big. My LO will be able to wear them for the rest of the summer. The shorts were pink with a unicorn and rainbow print. These shorts also come in the same print in blue. The quality is fantastic from this shop, the owner is passionate about what she does and its worth it to go and take a look at what she has to offer. This shop also has tons of other magical unicorn items to select from as well.

For Sephira'a accessories I found an adorable unicorn headband Bowtiful Soul on Esty. The headband was super sparkly and the unicorn figure was adorable. For shoes, Teeny Toes had the most perfect sparkle jellies to match mine. Also, in case if got cold I found a rainbow unicorn horn sweatshirt from Amazon that was a perfect fit. 

Because we had to drive 2 hours to the camp I was worried about having a diaper blowout in the car. so on our way, I dressed Sephira in some cute unicorn pajamas.

Leotard - 18 months
Shorts - Custom
Headband
Jellies - 3
Sweatshirt - 12 months
Pajamas - 12-18 months

Wednesday, April 26, 2017

How to Over Pack for a Week in Florida


Here is my blog for what I packed for my week trip to Florida, to visit my mom and stepdad. If you're looking for a minimalist's packing list, you have come to the wrong place. I'll share with you what I packed in my 3 bags. I'll provide all the links to the items that I bought. What I ended up overpacking were diapers and wipes. I was glad though that I didn't run out, though I only needed 2 backs.

This is what I packed in my diaper bag. I wanted to make sure all the items I would need to access frequently were easily accessible so I wasn't fishing around in the bag looking for something. When I make packing lists I always make sure I add everyday items that I would most likely have on me to ensure I don't forget anything. These items are my wallet (credit cards, cash, ID), my phone and my tickets. Then before I leave for my trip I can ensure that they are also with me.

Food
   👽 Oatmeal Cookies
   👽 Baby Mum Mums
   👽 Apples
Necessities
   👽 Wallet (Credit Cards, Cash, ID)
   👽 iPhone 7 Plus
   👽 Travel Pack of Tissues
   👽 Phone Charger and/or Portable Charger
   👽 Neck or Travel Pillow
   👽 Bluetooth Headphones. I love these because I don't have to fumble with my phone when I get a call while walking through the airport.
Playing
   👽 Toys. You want to make sure they are not ones that make any noises as a courtesy to other passengers. This means no electronic toys or ones with bells or squeakers. I packed my LO's rings, sensory book, and Butterfly security blanket. The best items to pack are your babies favorite. If one of their favorites is an electronic toy then just make sure it stays in the off position or the batteries are removed.
   👽 Books. As well as toys I pack a few books to keep their attention. I have recently started to purchase books that have to do with my LO's first. For this trip, I have a Day at the Airport by Richard Scary. Then inside the book, I marked the date that we went on her first airplane. This way I have a little memorabilia. I am also going to take some pictures of us in the airport. Then add the pictures and our ticket to the back of the book. Also, I packed some smaller Bitty Baby books and a Bizzy Bear Space Rocket book to match our travel outfits.
Changing: This is one of the most important things to pack. I would say every parent will most likely have all of these items in their diaper bag already.
   👽 New pack of Baby Water Wipes
   👽 About 10 Bambo Natures diapers. I am also going to back 20 more in my larger carry-on just in case.
   👽 2-3 Ziploc bags. This will be for dirty clothes or diapers I am unable to throw away. If you don't have Ziploc bags then disposable poopie bags or reusable wet bags would also work.
   👽 Changing pad. If one does not come with your diaper bag we use these pads from Target.
   👽 Grey Fleece Baby Blanket
   👽 Nature's Baby Organics Silky Dusting Powder
   👽 3 Basic Amazon Face Cloths
   👽 2 Pairs of Cotton Pajamas with Feet
Toiletries:
   👽 All medications and vitamins
   👽 Badger Unscented Balm
   👽 Hand Sanitizer

Carry-On Suitcase
I usually pack secondary essentials in my carry-on suitcase. These are items I probably won't need unless we got stuck at the airport overnight.
   👽 Tooth Brush/Travel Size Tooth Paste
   👽 Contacts/Travel Size Saline Solution
   👽 Breast Pads
   👽 Makeup. Most of my makeup comes from the brand 100 Percent Pure.
   👽 Face Cloths
   👽 Underwear
   👽 Pajamas
   👽 20 Diapers
   👽 Bras (Under Wire and Sports)
   👽 Sunglasses for Mommy
   👽 Jewelry
   👽 Grooming Kit/First Aid
   👽 Baby Carrier
   👽 Extra Changing Pad
   👽 Toys.
   👽 Books

Checked Bag
   👽 2 Packs of Wipes
   👽 3 Packs of Diapers
   👽 Toys
   👽 Books. We will be going to the beach for the first time so I purchased A Day at the Seashore. Then I'm going to print the date we go to the beach in the back of the book. Also, we are going to her first boat ride so I purchased Richard Scarry's Boats.
   👽 Matching Outfits. Some of these outfits are from our Matching Outfits Monday Post. But there will be a few more surprises that I will post on Instagram. To organize Sephira's headbands, socks, and legwarmers I used Ziploc bags.
   👽 Shoes

I looked up so go ways to prevent ear popping and all said that nursing as the plane is going up then down it the best. They also stated that it is the suckling that helps so if you don't breastfeed then a pacifier would work just as well.

Items that were a must to have on the plane were a neck pillow. This acted like a mini nursing pillow and made it much more comfortable for me. Also an infinity scarf or nursing cover, this was nice for my own privacy and doubled as a blanket to block out the light so she could sleep. With my outfit, I wore a nursing necklace and bracelet. This worked perfectly to have toys on hand that she was able to play with. We had 2 diaper changes during our trip there and back. If you haven't traveled on a plane with a little one they do have changing tables that pull down behind the toilet. Also because it was too much to bring Sephira and the diaper bag to the bathroom everytime I would just grab a diaper and 2 wipes. So, make sure you have these easily accessible. If you are traveling with another adult this will all be a lot easier. But because the trip was quick it was not too hard alone. Most people are more than willing to help you out which I was quite surprised about. Many times people offered to get my bags, pick up items I had dropped or offer me any help I might need.

I would try to travel when there is a school vacation this way there are other families on the plane. Because it was school vacation the week we went I felt more comfortable the more families with babies that I saw.

For transporting Sephira I used a baby carrier from LILLEbaby. I loved this because I was much more comfortable than my wraps and it has a convenient pocket on the front that was big enough for my phone, mini wallet, and ticket. When I went through security they let me wear it through the metal detector. This also left me hands-free to load my stuff on the conveyor belt and then gather my stuff up. You may want to bring a stroller depending on what you are doing once you are at your destination but my mother had already purchased one for our trip. If you are bringing a stroller and traveling alone I recommend the Austlen Entourage. This is great because you will be able to load your carry-on luggage and personal item onto the stroller.

I wish you all luck on your next trip and I hope you found this post helpful. I will be posting the Matching outfit we wore on Monday.

Don't forget to follow my blog by clicking the Follow button at the bottom. Also, you can follow me on Facebook @Veggiemomster and on Instagram @Theveggiemomster.

Monday, April 3, 2017

Matching Outfits Monday - Butterfly Kisses


Thank the universe for Matching Outfits Monday! Today in spite of all the snow we are doing a fun spring/summer look. We all need a spring time Mommy's Outfit, for the first warm days that come. This year butterfly prints are extremely popular. I think this will be a great look for a nice day in the park. For mommy, I found a realistic butterfly print t-shirt. I paired this with a cute distressed jean skirt. I ordered this shirt a size larger than I usually do because it has no stretch to it. For my LO I purchased a butterfly print shirt and jean skirt set. This was extremely lucky and got so excited when I found it. Since I found the outfit from Babies"R"Us I also purchased a purple butterfly teether and blanket. This way she had the complete look and I received free shipping.

A few notes on my LO's outfit in the picture it shows the skirt with buttons and a pair of bloomers. But, Mine came with no buttons and bloomers attached to the skirt. I didn't mind this at all because I liked the one that came even better. Also, the socks I purchased are a lot lighter then they appear in the picture on Amazon. The color you see in my picture is more accurate (light purple).

To give the outfit a more matching aspect I sewed a pink flower ribbon to the skirt. I sewed it toward the bottom of the skirts so they wouldn't be covered but the shirt.

Mommy's Outfit
💟 Butterfly Print Shirt - L
💟 Jean Skirt - 14
💟 White Sandals
💟 Purple Baby Carrier


Baby's Outfit
💟 Butterfly Print Shirt and Jean Skirt Set
💟 Butterfly Blanket
💟 Butterfly Teether
💟 Purple Bow
💟 Purple Leggings
💟 Purple Socks


Next week for MOM I'll show you what me and my LO will be wearing for our plane trip to Florida, plus what we will be packing for the week away.

Don't forget to follow my blog by clicking the Follow button at the bottom. Also, you can follow me on Facebook @Veggiemomster and on Instagram @Theveggiemomster.

Friday, March 31, 2017

Fast Fun Friday - Ribbons


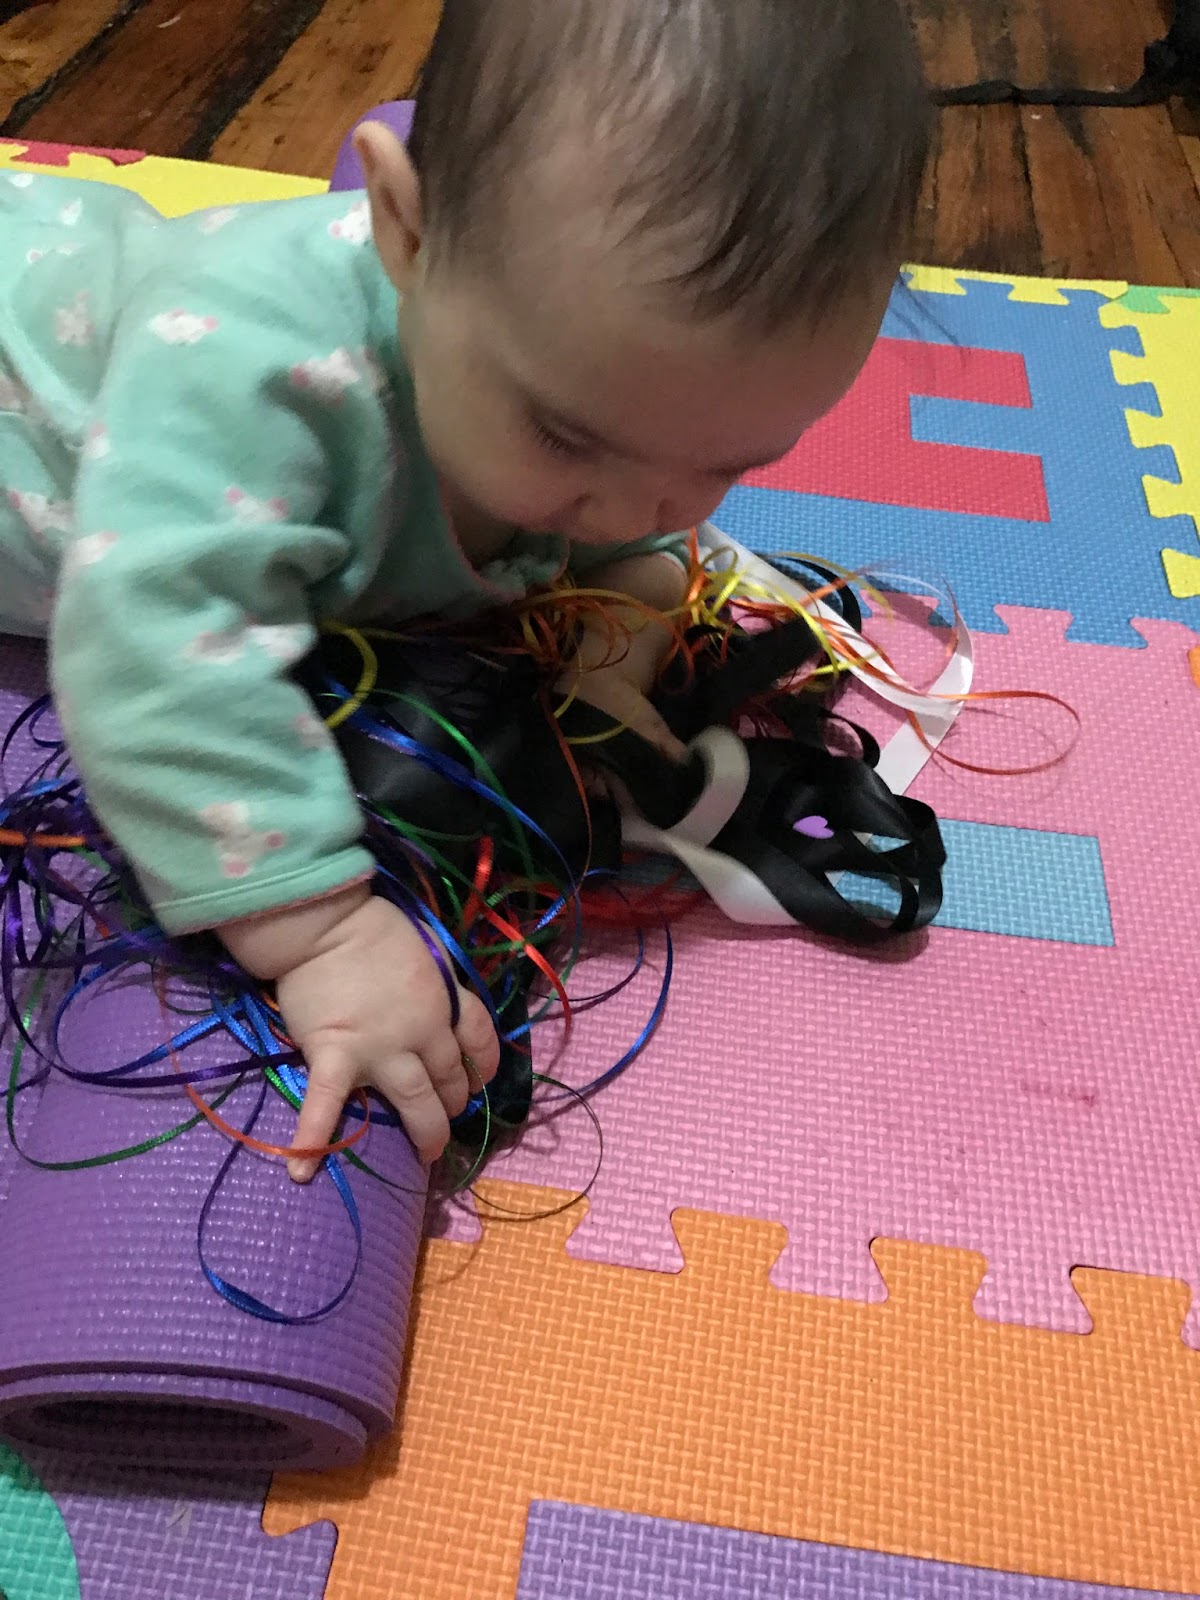
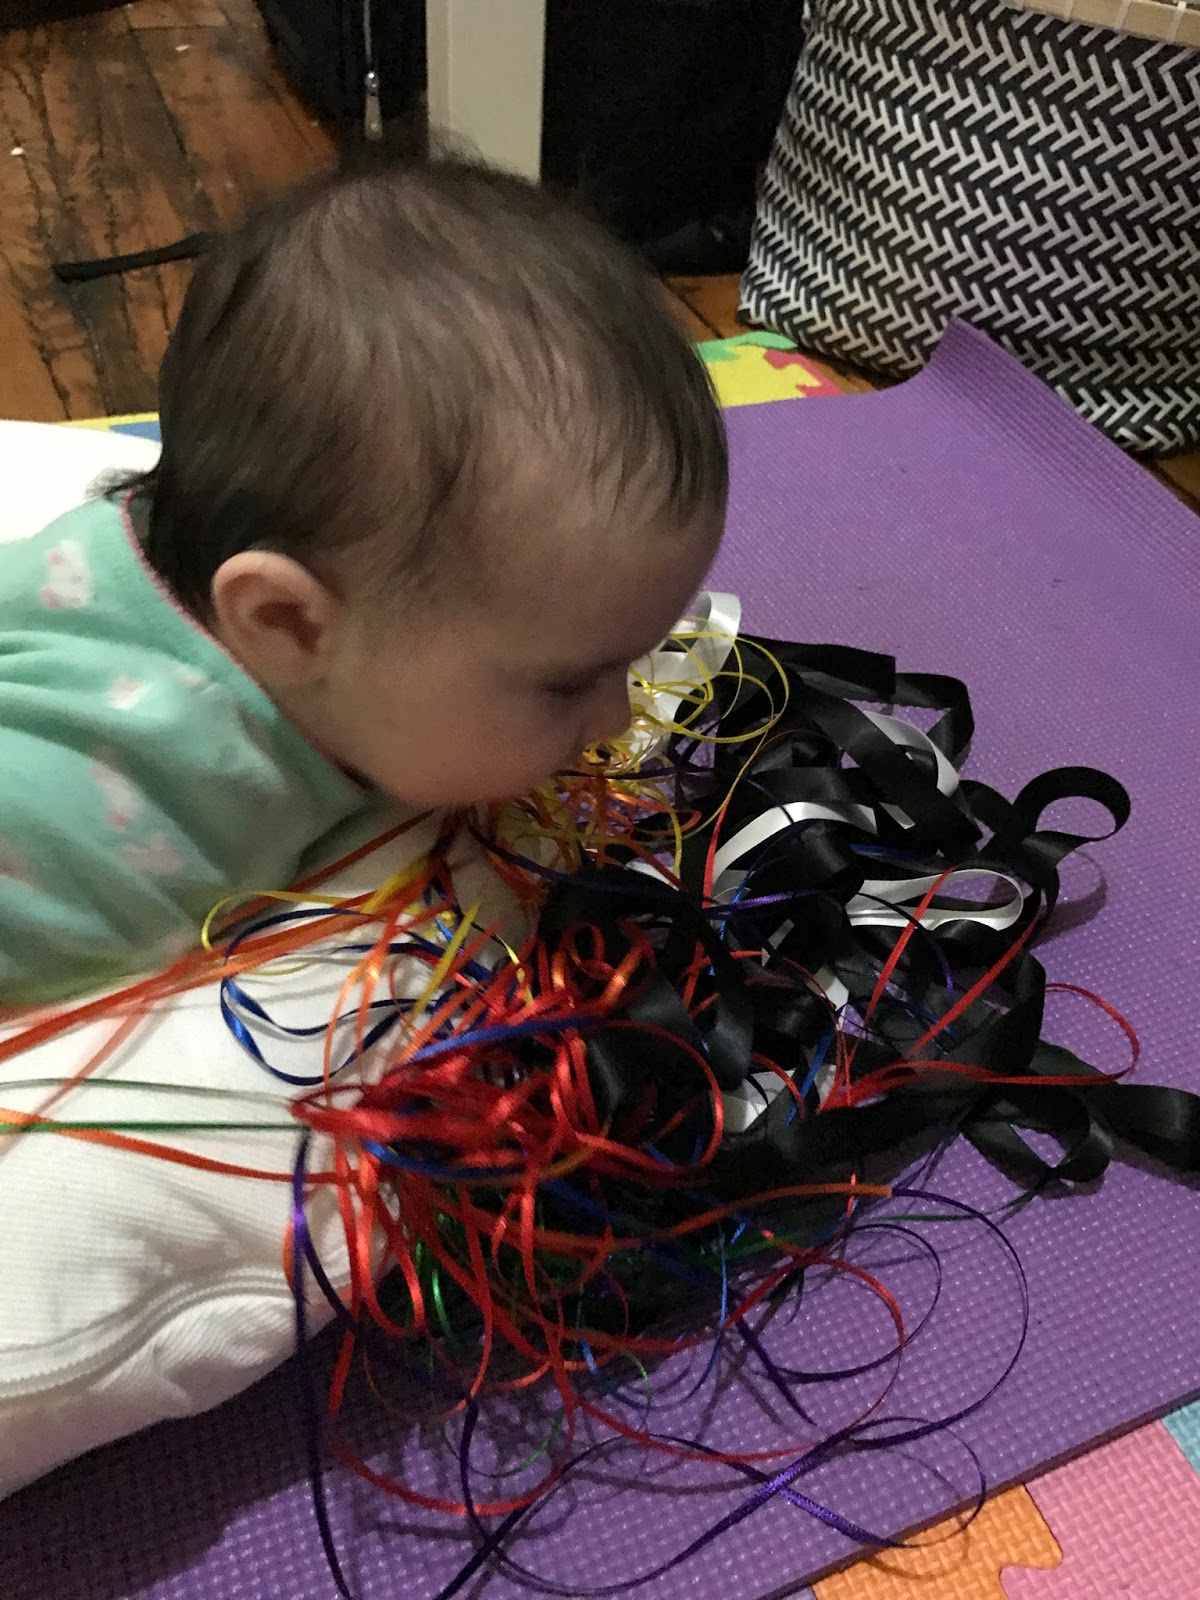
A great sensory play time is using different types of ribbon. There are so many types of colors, texture, and sizes. Because the ribbon is thin they will be great for baby's fine motor skills. I came up with this idea after my LO's 6-month photo. She was so interested in playing with the ribbon I used for the rainbow.  I alway try to have something that is a part of my LO's photos that will keep her attention and keep her happy. I also like this project because you can keep the ribbon in a plastic bag and use it again. Also, you can add more ribbon as time goes on. This will keep it interesting for your LO. You can add scraps of ribbon you may have from different projects, so they do not go to waste.

What you will need;
💜 Different color, texture and size ribbon
I'm using some thin red, orange, yellow, green, blue and purple ribbon. Then some thinker black and white ribbon.


For this project, I just propped my LO with a rolled up yoga mat and DockATot and placed the entangled ribbon.

Do not leave your LO alone with the ribbon because this could be extremely dangerous if they get too tangled.

Don't forget to follow my blog by clicking the Follow button at the bottom. Also, you can follow me on Facebook @Veggiemomster and on Instagram @Theveggiemomster.

Sunday, March 26, 2017

Baby Shirt Tutorial


Today we are going to make a cute Easter shirt. This is a great project for when you are strapped for cash bust still want a super adorable outfit for a party, photo shoot, or just for every day.  I used a sewing machine to make the process go a bit faster, but if you have the time and patience then you can use a hand needle and thread.

What you will need for this project;
💛 Fabric, of your choice (I choose broadcloth with an Easter print that I got from Hobby Lobby
. Broadcloth is extremely easy to work with especially if this is your first time sewing.
💛 Thread
💛 Sewing machine or hand needle
💛 Scissors
💛 Tape Measure
💛 Iron
💛 Pins
💛 Snap Closure or Elastic
💛 Any extra embellishments (optional)
💛 Double Folded BiasTape (optional)

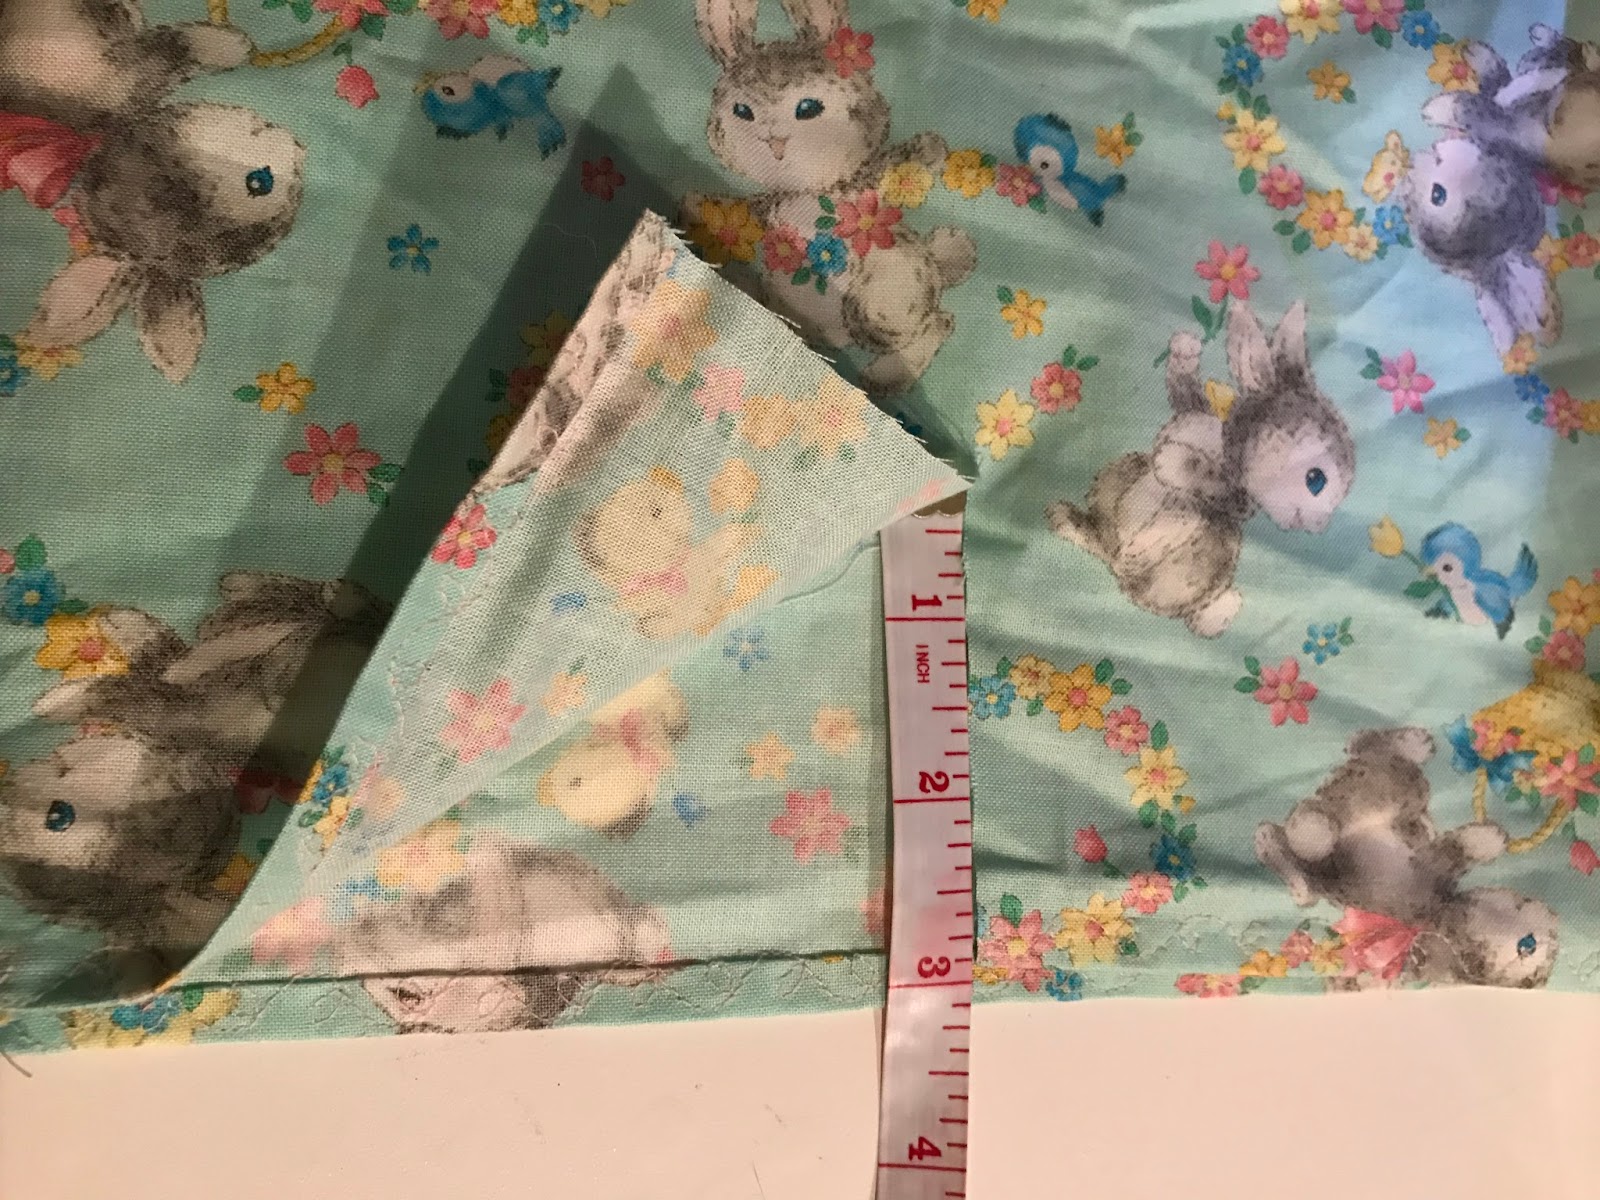
First, you want to measure your baby's chest, you will need a tape measure to do this. With you baby lying down wrap the tape measure around their chest. For my LO I got 19inches. I added an extra inch for seam allowance. I then with my fabric I cut 2 identical pieces. This will be the front and back of your shirt. For mine, the top measurement of the pieces is 10, the bottom is 18 and each side is 9. The 10 comes from half of my LO's chest measurement. The bottom was 4 inches longer on each side than the top (10+4+4=18). The sides came from how long I wanted the shirt to come down plus an inch for seam allowance.  After measuring out your fabric you should come out with a trapezoid. Cut 2 trapezoids with the same dimensions.

Now we are going to finish our edges. You can use double folded bias tape or you can double fold the fabric like I did and use an iron to make your creases before sewing. If you are using an iron make sure your fabric can withstand the heat and won't melt. First, you want to fold over your bottom edge of your first trapezoid and iron that down. Then fold it over again so you can longer see the rough edge and iron that down. Repeat this for just the top and bottom edges of both of your trapezoids (NOT the sides).
One Fold
2nd Fold


Now to sew those sides down. I have a Singer Patchwork machine so I chose a cute leaf stitch but any stitch will work for this. Taking your machine or needle and thread tack down the sides you just ironed.

Once that is complete you can sew your 2 pieces together. Make sure you place your fabric with the print side facing each other before sewing. This is so when you sew your pieces, the seams are on the inside of the shirt. Pin them together, then using your machine or needle and thread sew the 2 raw edges together.


Once the 2 pieces are sewn together you can take the pins out and turn it right side out. now its time to add your closure. I'm suing some sew on snaps. The fist thing you want to do is decide what side you want to be the front. Then at the top of the back piece right in the middle cut it down 3 inches.

The like we did in the beginning, fold the raw edges down twice, iron, then sew to finish your seam.

This is a good time to try it on your little once to see where you need to add your closure. Once you add your closure you are done. If you want you can also add some embellishments to finish it off. I have this crystal button that I added to hide the stitching from the closure.


For bottoms, I took bloomers from another outfit or you can purchase some really nice cheap ones from NordeensBabyCouture. They have them in every color and they are really soft.

I hope this was a fun and easy project that gave you an opportunity to get creative and save some money.

Don't forget to follow my blog by clicking the Follow button at the bottom. Also, you can follow me on Facebook @Veggiemomster and on Instagram @Theveggiemomster.


Friday, March 24, 2017

Fast Fun Friday - Rice Play


This week for Fast Fun Friday, we are going to be playing with rice. I like using uncooked rice for playing because your baby will be able to manipulate it easier. You can write numbers and letters using your babies fingers or your own. Also, rice is one of the best things for fine motor skills.

Thing you will need;
💙 Rice
💙 Pan or Tupperware
💙 Food Coloring (Optional)
💙 Small Baby Toys (Optional)

If you have food coloring you can also add color to your rice. If you decide to do this I would suggest making 2 to 4 separate bowls of rice and coloring them each a different color. Then on your pan, you can add each color of rice to the separate corners. Your little one will have fun as they mix the colors together. If you don't have any food coloring you can use different types of rice for you LO to mix together. Some good options to mix would be White, Brown, Chinese Black Rice, Wild Rice, etc.
Also, like more of my Fast Fun Friday project you can add small toys to the rice. Feel free to add more rice to hide your LO's toys so they can use their hands to dig for them. Rice will get everywhere so make sure your playing surface is easy to clean.


*Never leave your baby alone unsupervised while playing with the rice. 

Hope you had fun with this quick and easy sensory play. Tomorrow we will be doing an Easter outfit sewing project, so stay tuned.

Don't forget to follow my blog by clicking the Follow button at the bottom. Also, you can follow me on Facebook @Veggiemomster and on Instagram @Theveggiemomster.

Thursday, March 16, 2017

Mother's Room Upgrade!


I have been back to work for about 2 months now, and I pump 3 times a day for about 20 minutes. I am one of those lucky few that has a company that supports their breastfeeding journey. Recently I have found that not everyone is as lucky as me especially with the number of times I get to pump and the duration.

But I thought I might get a little bit more greedy with my Mother's Room situation. As I was pumping one day try out some of my suggestions I made on my 10 Things to do While Pumping blog entry, I noticed how bright the light was. I'm sure as most of you know the mother's room is usually a tiny room with a desk, chair, and fridge if that. But we also got an industrial sized fluorescent light. Oh yeah, that's relaxing. So I wanted to add a few things to our room to make the 3 times a day I visit it more pleasant, and not just for me for all the mothers. So here is a list of the things I think all mother's rooms should have. This way if something is forgotten or broken your day is not lost.

💜 Mood Light

💜 Breastpump Sanitize Wipes

💜 Breast Pads

💜 Snacks (Water, and Made Good Chocolate Chip Granola Bars)

💜 Nursing Tea

💜 Replacement Parts

💜 Milk Storage Bags (Lansinoh)

💜 Tissues (Puffs Plus Lotion)

💜 Notebook and Pen

💜 Baby Wipes (Whole Foods 365 Brand)

💜 Hand Sanitizer

💜 Paper Towels and All Purpose Cleaner or Disinfecting Wipes (Seventh Generation Brand)

💜 Steam Sanitize Bags

💜 Coloring Book and Crayons
Before  
After

After

I hope this inspires you all to upgrade your mother's room. Let me know what else you added to your mother's room.

Don't forget to follow my blog by clicking the Follow button at the bottom. Also, you can follow me on Facebook @Veggiemomster and on Instagram @Theveggiemomster.